So far, we have been using inline styles to build our portfolio.
Read this article to catch up on the differences between Inline and Internal styles.
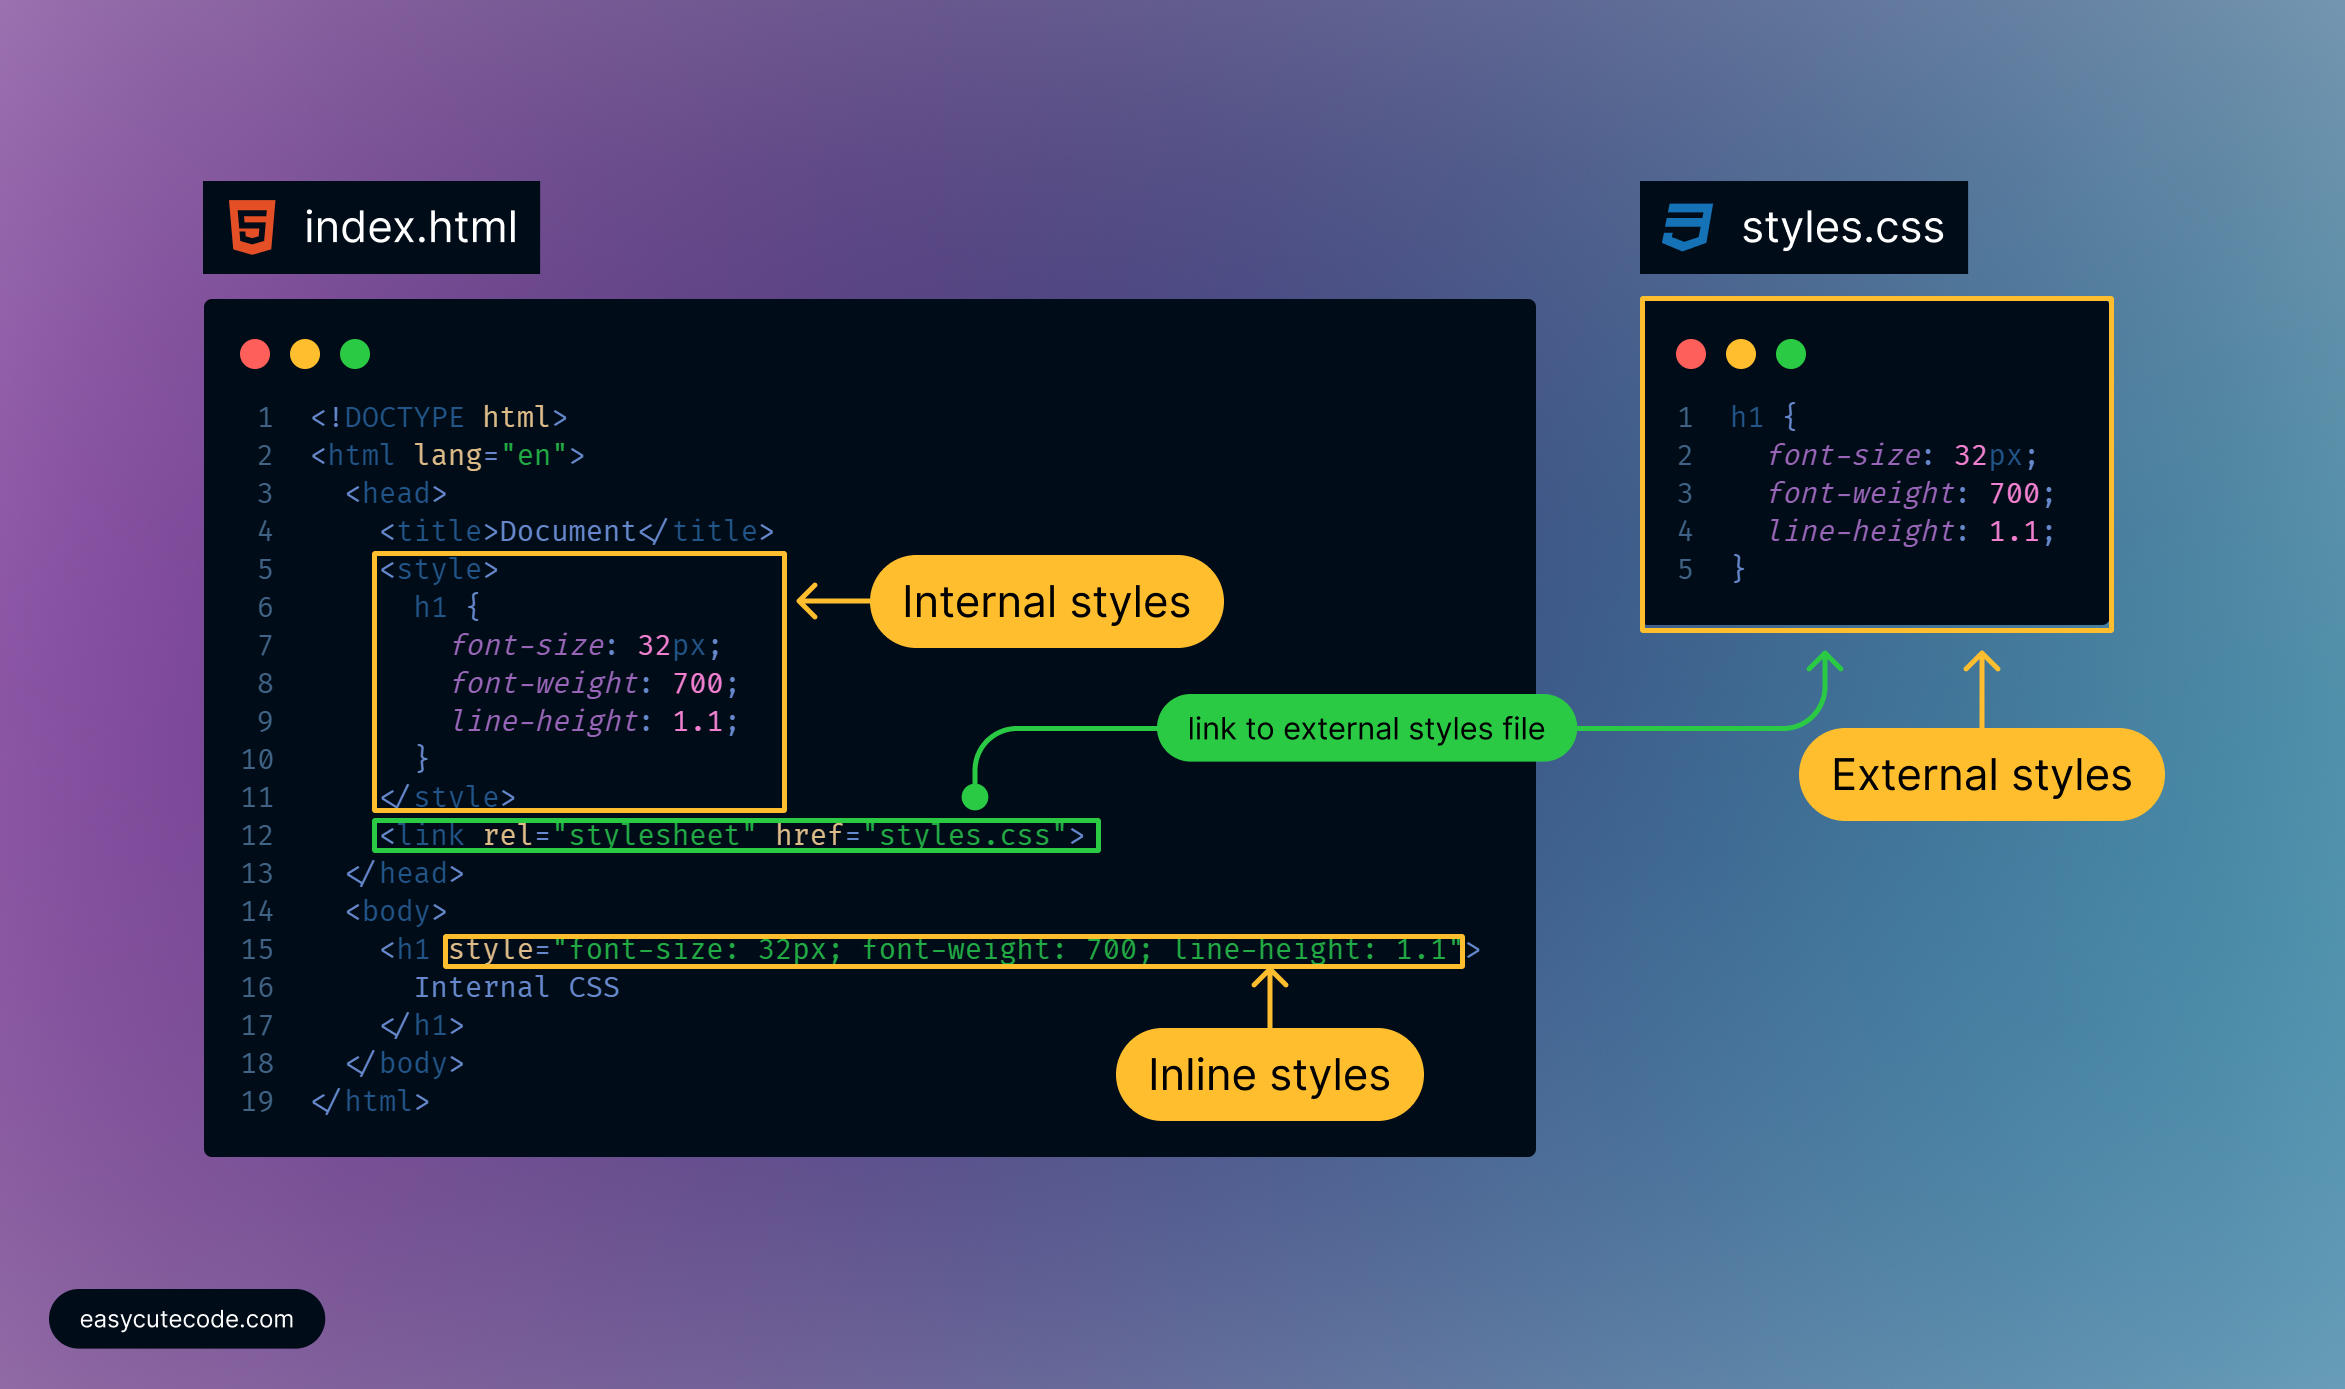
Inline styles
Inline styles have their place in the development lifecycle, but it definitely should not be used as the main styling method between inline, internal and external. Here’s one reason why..
Repetition
In your development progress you will be spending a lot of time on a project and you will be looking for ways to save time, not just time in minutes or hours but also ‘time’ in headaches trying to fix issues that will arise in your project in the future.
What is repetition when developing?
When coding, repetition is simply having duplicate ‘meaningful’ code. But what is meaningful code? Generally speaking, meaningful code is simply a piece of code that can be named based on what it does, also meaningful code lies in the eyes of the developer. An example of a meaningful piece of code is code that defines a button .
This is the piece of code we used to define a button for our portfolio. If we needed another button, all we would need to do is to copy this code and paste it where we need it. No need to REPEAT typing this code and consequently no repetition.
In our case, repetition simply means we don’t need to retype the button code for example, all we need to do is to copy and paste it where we need it. Later on, we shall see how repetition goes beyond copying and pasting.
<button style="background-color: #2563eb;color: #ffffff;padding: 1rem 2rem;font-weight: 500;text-transform: uppercase;font-size: 0.75rem;border-radius: 0.25rem;border: none;margin-top: 16px;">
  Linkedin
</button>
Avoiding repetition is the basis for the existence of component libraries. All the component libraries solve the problem of repetition. For example, look at this bootstrap component library then on the sidebar scroll to the components section, there you will find what I am referring to as ‘meaningful code’ such as ‘button, accordion, alert, badge etc.’
DRY code
Repetition is such a time waster that there is a principle in software development called “Don’t Repeat Yourself” aimed at reducing repetition.
Adding more buttons to your portfolio
Add two extra buttons (code below) right bellow the current button. Now you will have three buttons.
<button style="background-color: #2563eb;color: #ffffff;padding: 1rem 2rem;font-weight: 500;text-transform: uppercase;font-size: 0.75rem;border-radius: 0.25rem;border: none;margin-top: 16px;">
  Facebook
</button>
<button style="background-color: #2563eb;color: #ffffff;padding: 1rem 2rem;font-weight: 500;text-transform: uppercase;font-size: 0.75rem;border-radius: 0.25rem;border: none;margin-top: 16px;">
  Instagram
</button>

Now we have repetition
The three buttons are identical except for the text, everything else is the same. Try to change the background-color of the button to this purple shade 9f01e9. You will have to copy and paste the value three times. Now this project has only three, so updating repetitive code is not a big deal, but when there are more, it gets crazy.
The issue with Inline styles
Inline-styles are repetitive by default. So let’s move our button styling from inline-styles to internal-styles. To achieve this, all we need is to add the styles inside the <styles> tag that will be placed inside the <head> tag and add a custom class name to the button, let’s call the class “button”
Replace the three buttons with this three lines of code.
<!-- Add button -->
<button class="button">LinkedIn</button>
<button class="button">Facebook</button>
<button class="button">Instagram</button>
Then add this internal styles inside the head tag.
<head>
    <meta charset="UTF-8" />
    <meta name="viewport" content="width=device-width, initial-scale=1.0" />
    <title>Portfolio</title>
    <style>
      .button {
        background-color: #9f01e9;
        color: #ffffff;
        padding: 1rem 2rem;
        font-weight: 500;
        text-transform: uppercase;
        font-size: 0.75rem;
        border-radius: 0.25rem;
        border: none;
        margin-top: 16px;
      }
    </style>
  </head>
Arranging the buttons in a row.
Right now the buttons are arranged in a single column, one stacked on top of another, and we’d like to arrange them horizontally. Let’s do that in the next episode.
Responsive styles
You can only do so much with inline styles; for example, you cannot add responsive styles using media queries, and we would like our portfolio to look ‘good’ on mobile browsers.
Our portfolio is still not responsive, meaning it does not look good on mobile or tablets; it is only optimized for desktops.
In general, inline styling is not considered best practice. However, there are times when inline styles are the right (or only) choice.
Why can’t we use inline styles as the primary way of writing styles?
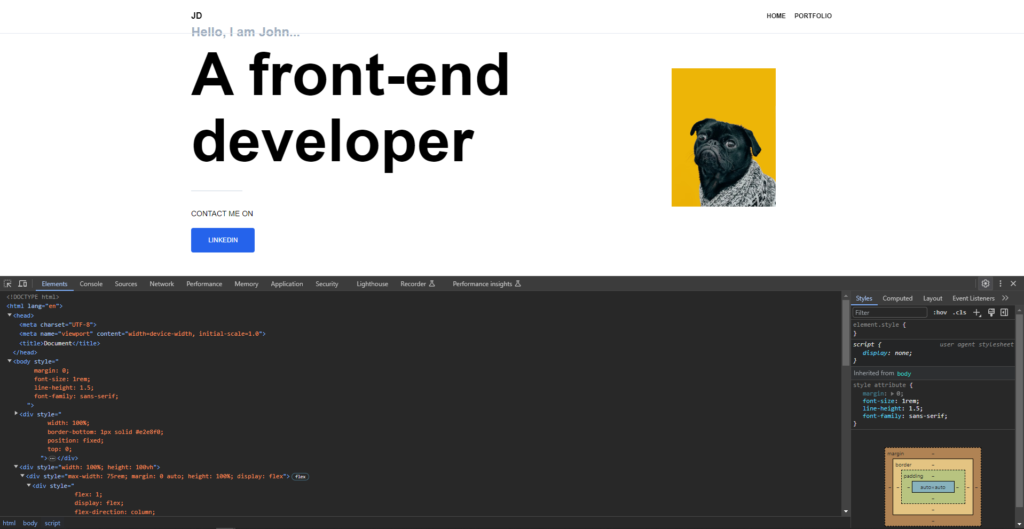
‘inspect’ the page on a browser.
Browsers allow us to preview the ‘code’ and everything behind the scenes when loading a web page. All we need to do is ‘right-click’ anywhere on a web page and select ‘Inspect.’
A section that will contain useful information when developing HTML pages appears. The section can appear on the page’s left, right, bottom or a separate window. In this instance, it appeared at the bottom of the page.